BIOS
Introduction
The BIOS (Basic Input/Output System) serves as the fundamental bridge connecting the motherboard and operating system in your computer. It resides in the Flash Memory on the motherboard. When you start up the computer, the BIOS is the first to take control, initiating a series of checks known as the POST (Power-On Self Test) to ensure all hardware components are functioning properly. It identifies and configures hardware settings and prepares the system to hand over control to the operating system. The BIOS is crucial for system stability and optimal performance.
Within the BIOS setup menu, you’ll find a range of options to configure. Below, we outline the function keys used to navigate and modify settings within the BIOS:
Esc: Exit the BIOS setup.
Arrow keys (↑↓←→): Navigate through options.
F10: Save changes and exit.
Page Up/Page Down or +/-: Adjust settings for selected options.
Accessing BIOS
To enter the BIOS setup:
Power on your computer and immediately press the
Delkey.If you miss the initial prompt, restart your system by turning it off and on, or by pressing
Ctrl,Alt, andDeletesimultaneously to perform a soft reboot.
BIOS Menu Overview
The BIOS main menu offers a range of configurable settings crucial for tailoring your system’s operation. Here’s how you can navigate through these options efficiently:
Navigating Screens: Use the left (
←) and right (→) arrow keys to switch between different settings screens.Selecting Options: Use the up (
↑) and down (↓) arrow keys to highlight the specific option you want to adjust or confirm in the main menu.Modifying Values: Press
Enterto select an option for modification. Use the plus (+) and minus (-) keys to adjust the values for the selected option.Shortcut Keys:
F1: Displays general help.F2: Reverts to the previous value.F3: Loads optimized default settings.F4: Saves changes and resets the system.Esc: Exits the BIOS Setup.
BIOS Help Feature
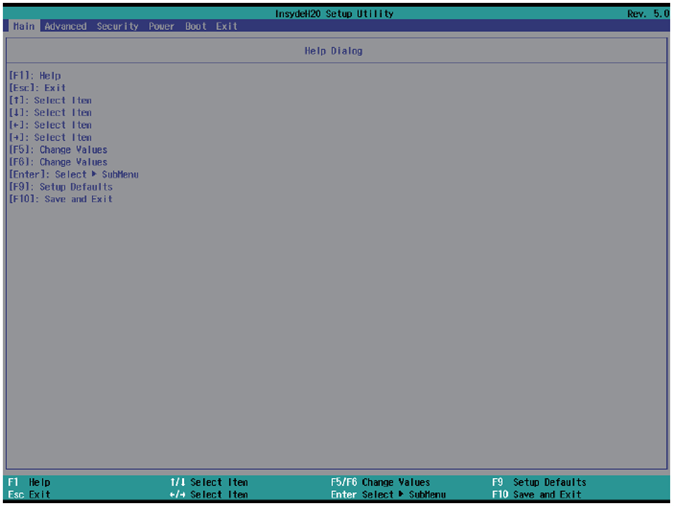
Access the BIOS Help window by pressing F1. This feature provides a detailed description of the function keys and their uses for the highlighted menu item. Press Esc to close the Help window.
Detailed Menu Options
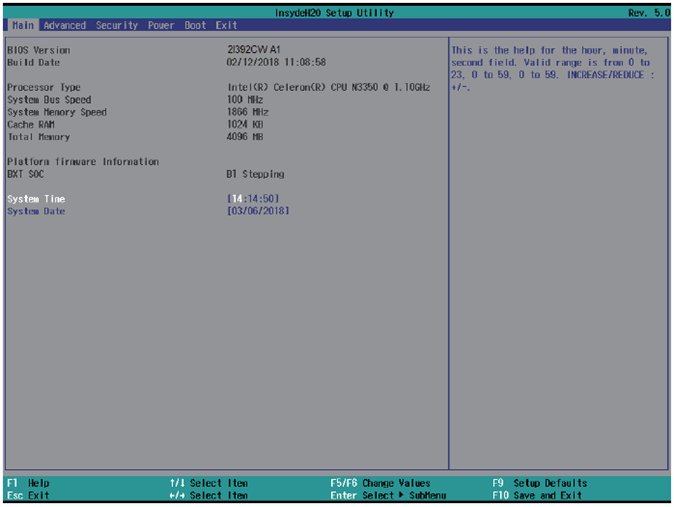
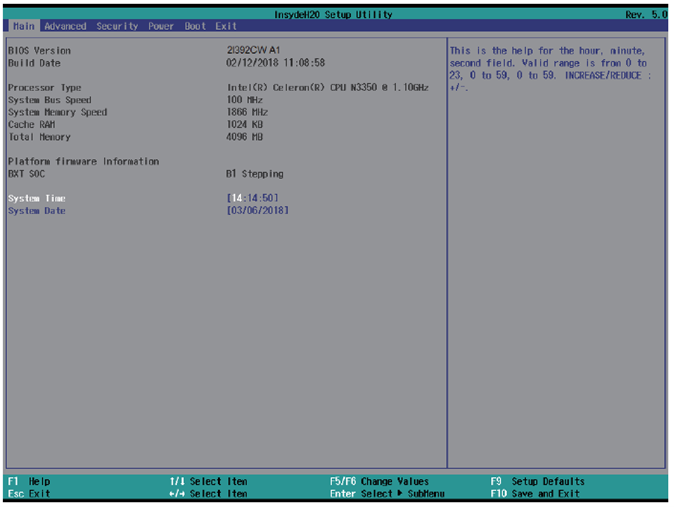
The main menu screen displays basic system information and allows for easy configuration:
System Date: Adjust the system date by using the
Tabkey to move between elements and the numerical keys to set the values.System Time: Set the system time in a similar manner, utilizing the
Tabkey for navigation and numerical keys for adjustments.
These settings help ensure that your system functions correctly and maintains accurate logs of system events and tasks.
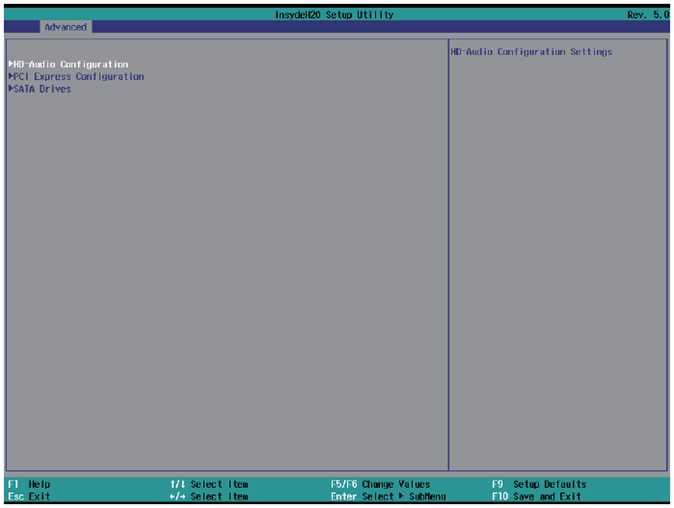
Advanced BIOS Settings
Explore the configuration possibilities for your system’s performance and functionality. Adjust settings to suit your hardware requirements and preferences.
Video Configuration
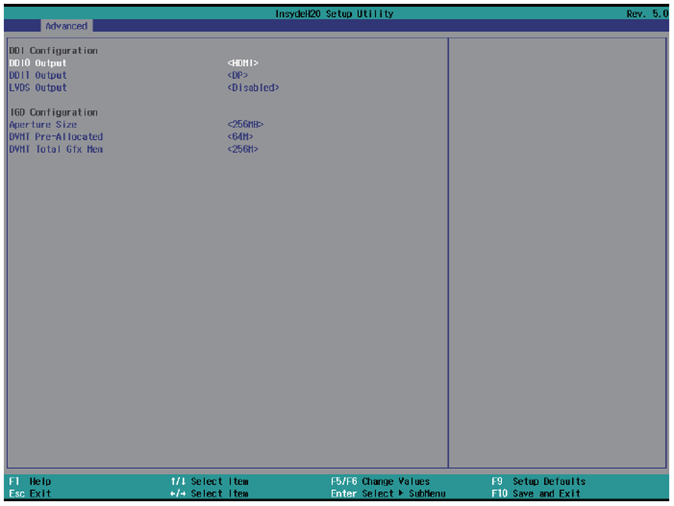
Fine-tune the graphics performance by configuring the memory allocation:
Aperture Size: Choose between 128MB, 256MB (default), or 512MB to optimize your system’s graphics memory usage.
IGD - DVMT Pre-Allocated: Set the fixed allocation for the integrated graphics memory. Available options are 64MB (default), 128MB, 256MB, or 512MB to enhance video performance.
IGD - DVMT Total Gfx Mem: Adjust the total available graphics memory for the system, with choices of 128MB, 256MB (default), or the maximum supported by your hardware.
HD-Audio Configuration
Control audio capabilities to suit your media needs:
HD-Audio Support: Toggle the high-definition audio to enhance your multimedia experience. Available settings are Enabled (default) and Disabled, allowing you to optimize audio performance according to your needs.
PCI Express Configuration
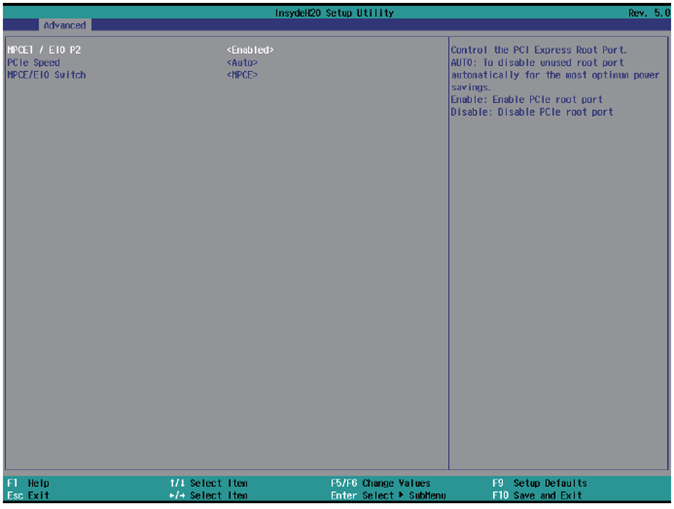
Configure the PCI Express settings to optimize connectivity and performance for expansion cards:
MPCE1 / EIO P2: Enable or disable the MPCE1 slot with options for Disabled or Enabled (default), adapting to your hardware expansion needs.
PCIe speed: Set the operational speed of the PCIe slots to match component specifications for optimal performance. Options include Auto (default), Gen1, and Gen2.
MPCE / EIO Switch: Direct the PCIe signal either to the MPCE1 (default) or to the EIO, catering to different internal expansion needs for OEM I/O or function boards.
SATA Drives Configuration
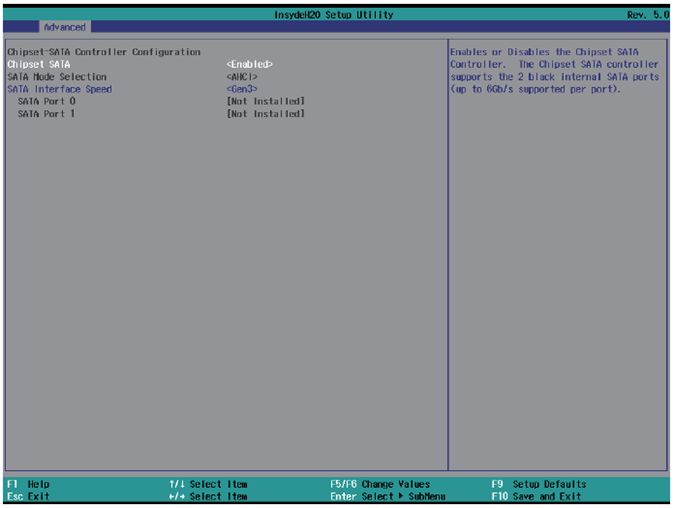
Manage SATA settings to control internal storage interfaces and improve drive performance:
Chipset SATA: Toggle the SATA controller to enhance system compatibility and power management with options for Enabled (default) or Disabled.
SATA Mode Select: Note that the Arrakis MK3 operates exclusively in AHCI mode, ensuring modern storage performance and features.
SATA Interface Speed: Choose the operation speed of the SATA ports to match your drive capabilities for improved data transfer rates. Available speeds are Gen1, Gen2, and Gen3 (default).
Thermal Configuration

Adjust the system’s thermal settings to optimize performance and prevent overheating:
Thermal Configuration Parameters: Manage the system’s temperature thresholds that determine at which temperatures the OS will take critical actions.
Critical Trip Point: Set at a default of
110°C, this is the temperature at which the system will shut down to prevent damage.Passive Trip Point: Set at a default of
105°C, this is the temperature at which the system begins to throttle CPU frequency to reduce heat generation.
SIO FINETEK 81801U Configuration
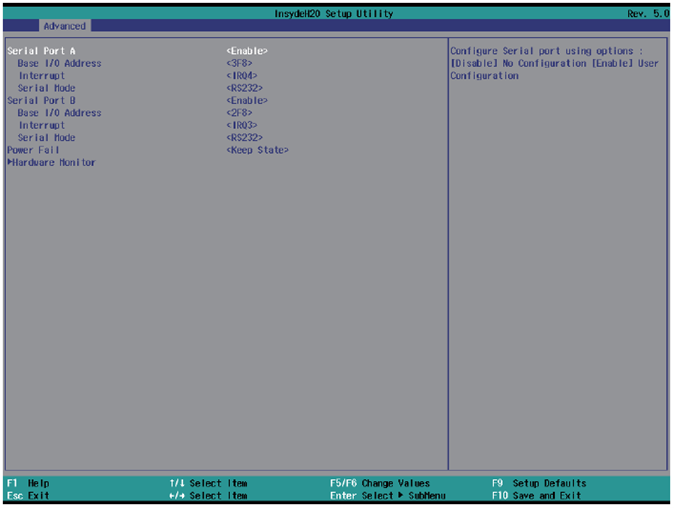
Configure serial port settings and power failure responses for system stability and expanded connectivity:
Serial Port A/B: Enable or disable COM ports as required, with both ports enabled by default.
Base IO Address / Interrupt: Customize the I/O addresses and interrupts for each serial port with options such as:
IO=3F8h; IRQ=4for Port A (default)IO=2F8h; IRQ=3for Port B (default)
Serial Mode: Select between RS232 (default) and RS485 modes, the latter includes auto flow control for RS485.
Power Failure Settings:
Keep state(default): Maintains the system’s last state in case of power disruption.Always on: System reboots automatically after power restoration.Always off: System stays off after power loss.
Hardware Monitor: Monitors and displays crucial system voltage and temperature readings, providing real-time data to safeguard the system’s operational health.
Security Settings
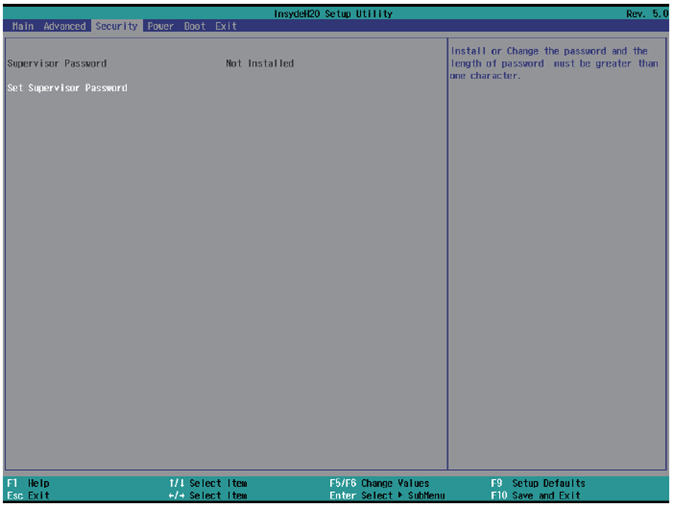
Set up a Supervisor password to enhance system security:
Select Supervisor Password: Opens a dialog to create a new password.
Create Password: Enter a password between 3 and 10 characters long.
Confirm: Press the
Enterkey to set the password.
Power Management
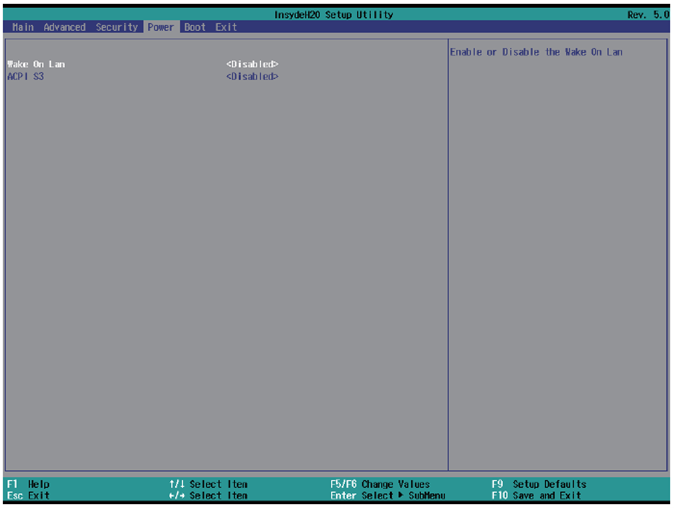
Configure settings to manage power and wake capabilities:
Wake on LAN: Enable the system to wake from sleep states (S3 or S5) via LAN.
Options:
S3,S5,S3 / S5,Disabled(default)
ACPI S3 Support: Decide if the system should support the ACPI S3 sleep state for energy saving.
Options:
Enabled,Disabled(default)
Boot Configuration
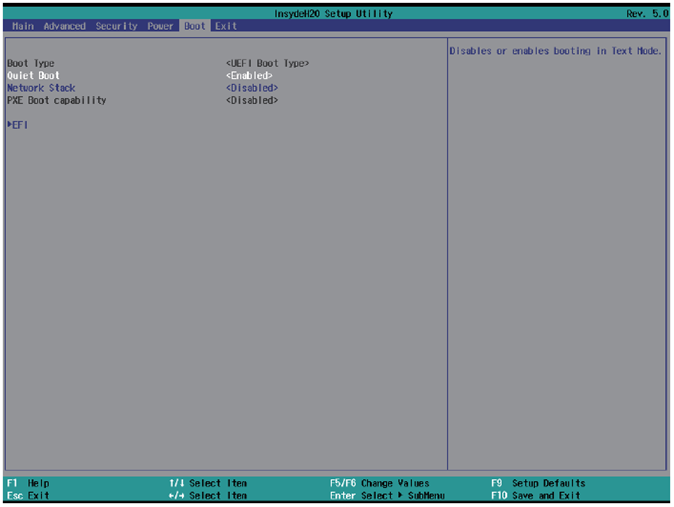
Manage settings that control the system’s boot operations:
Boot Type: Specifies that the Arrakis MK3 supports UEFI Boot only.
Quiet Boot: Controls the display of messages during boot.
Options:
Enabled(default),Disabled
Network Stack: Enable this if using PXE functionality; otherwise, it should be disabled (default).
PXE Boot Capability: Sets the protocol for PXE operations.
Options:
Disabled(default),UEFI: IPv4,UEFI: IPv6
EFI Device Priority: Determines which EFI-enabled storage device the system should boot from.
Exit Options
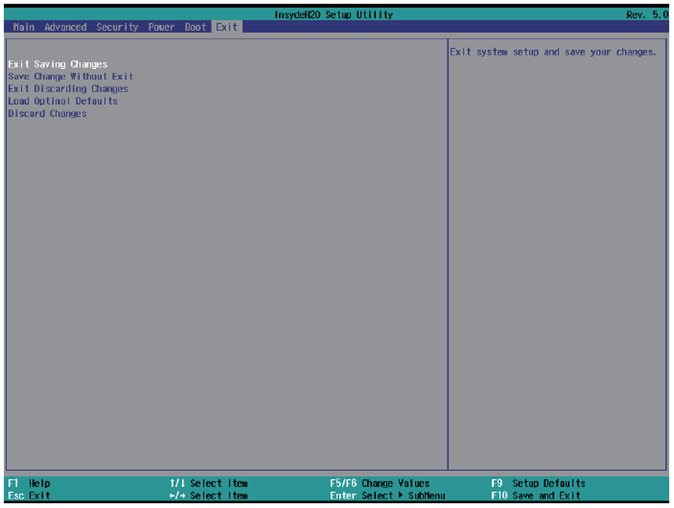
Manage your BIOS settings changes efficiently with these exit options:
Exit Saving Changes: Saves all modifications and reboots the system, applying the new settings.
Save Changes Without Exit: Saves your changes without rebooting, allowing you to continue adjusting settings.
Exit Discarding Changes: Exits the BIOS without saving, reverting to previously saved settings, and reboots the system.
Load Optimal Defaults: Resets the BIOS to the factory settings, which are optimized for general use.
Discard Changes: Cancels any unsaved changes, reverting to the last saved configurations.